
It’s the Kootenay Division, ca. 1970 – that means a lot of Fairbanks-Morse/Canadian Locomotive Company power. I’ll be covering the H16-44s in another post, but this is about my C-Liners.
C-Liners were only produced in N scale by Life-Like in a DCC incompatible format. There’s a good review on Spookshow.net detailing them – they’re great runners, powerful pullers, and you can’t drop a decoder into them. All CP units are from the original 2001 run.
I didn’t take a ton of pictures for a step-by step, since I fully expected the decoder to fizzle and smoke the first try, so bear with me.
First off, you’ve got to disassemble the locomotive – be comfortable with this! You need to take the frame apart and remove the motor in order to isolate it from the frame, as well as mill the frame. I didn’t take any photos of these steps, but they are exactly the same as installing any other decoder, and there’s a great set of instructions here on the TCS site:
https://tcsdcc.com/installation/n-scale/life-c-liner/m1
Milling.
This is what I was nervous about. I decided to use a dremel such as this one with a a cutting wheel on it to slice out a rectangle. I actually ended up using my older corded one rather than my newer battery powered one because you will drain a battery way too fast doing this!
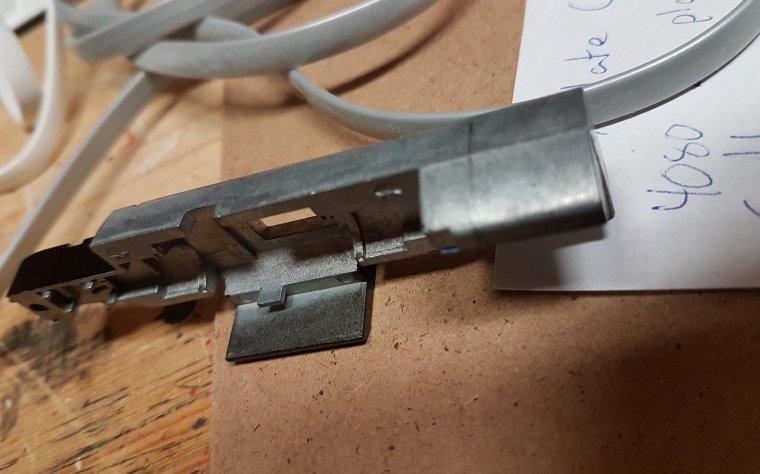
I had to mill 2 spots on the frame – one at the rear for the speaker, and at the front for the decoder. The frame is shaped oddly at the back, and looked like the easiest place to make room for ESU’s 11x15mm speaker. These come with sound chambers, but in N scale, space is truly limited, so I just glued the top plate over the speaker with CA and went with it. If you want cheaper options, they’re out there, without baffles.
I marked where I was going to cut with pencil.
SAFETY TIME!
So you’re using a dremel. Chunks of metal are flying everywhere. The cutting wheel jams and breaks. Are you hurt? No! Why not? Because you’re wearing a long sleeved shirt, safety glasses, maybe even a full face shield if you have one. Do your milling in a box to contain debris, and watch out, the frame gets HOT! I made 2 cuts, one vertical at the pencil line and one horizontal just underneath where the weight protrudes – the perfect size for the speaker. The speaker fits with the long dimension across the frame.
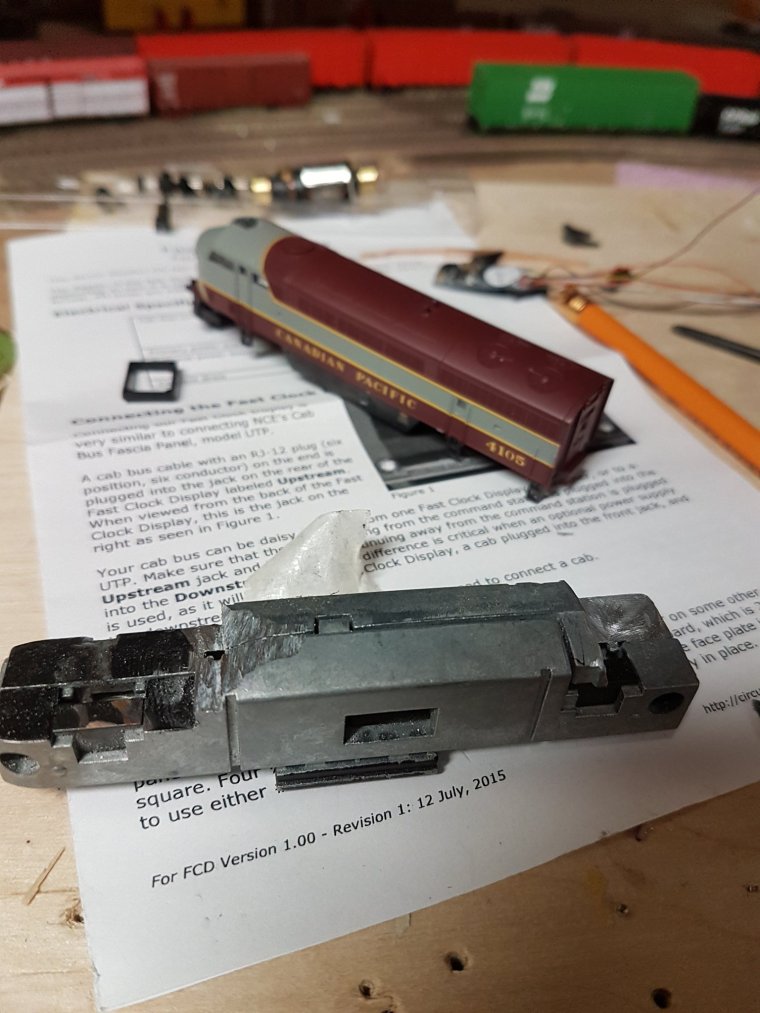
Meanwhile, in the front, there’s a cutout in the weight for the cab, but it’s too small for the decoder. I decided to mill back from the cab front – just a tiny bit. I also shaved a little bit off the top behind for the wires. WATCH OUT – The motor flywheel cavity comes up a bit here, and you don’t want to mill into there. (I did, but only one one side so it’s fine I guess?)
Now it’s time to install the decoder. Once again, these instructions work for the motor, electrical pickup, and lights:
Do yourself a favor and use pre-wired SMD LEDs. They’re super bright, and you don’t have to mess around with tiny tiny solder pads. Example on Amazon
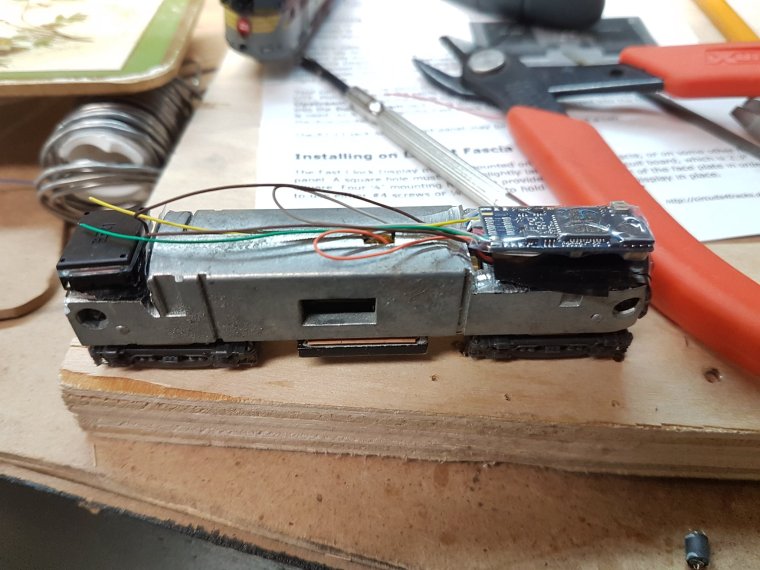
The hard part is over, so just attach a brown wire to each of the 2 speaker tabs, being careful not to touch the enclosure. Use whatever adhesive you prefer to hold it down, and you’re done! I left way too much wire, just in case. The green and yellow are spares if you need other lighting functions. I ended up putting a piece of tape over the top to keep them all in line.
So this was my first go at a sound installation in any locomotive, and the age of this unit made it terrifying to me – I’m going to update this with more, better pictures when I do another install.
A last night – fitting the shell can be a bit challenging. Make sure the decoder is snugged far enough back that it is behind the front cab windows, otherwise it will jam into them. Also, if you force the shell on and find that it widens in the middle, it’s incorrectly positioned – see the slots in the frame? Those need to match up with the tabs inside the shell. Made that mistake myself, but now it looks great!
Here’s a video of a consist led by 4105 making its way across my layout.
I picked up a Lokprogrammer and used it to load the FM 38D soundfile, which is 2 cylinders short, but close enough. I also tweaked volume levels so the random effects and sander are extremely quiet, since you can’t really hear them from a distance, the bell is middlingly loud, and the horn is the loudest – and of course, master volume is way down!
Feel free to comment if you have questions, I’ll answer the best I can.
